Guide
Kakobuy Shoes QC Guide: Read the Pair as a Pair
Footwear QC is different from clothing QC because the left and right shoe create their own comparison.
Start with pair symmetry and overall geometry. Measurements and close-up details come after the basic pair makes sense.
Read the Pair in Order
Pair Overview
Ask:
- same model and colorway?
- same size labels?
- visible left/right symmetry?
- obvious damage or missing pieces?
Do not zoom in yet.
Toe Shape
Compare the toe boxes from the same angle.
Look for:
- height difference;
- width difference;
- asymmetric curvature;
- uneven panel placement;
- obvious material deformation.
Small perspective differences can exaggerate shape, so use multiple views when possible.
Side Profile
Compare:
- midsole/sole geometry;
- panel placement;
- stitching paths;
- logo/graphic position;
- heel-to-toe curvature.
A side view is also useful for seeing whether the two shoes sit similarly on a flat surface.
Heel
Check:
- heel alignment;
- left/right height;
- rear logos or embroidery;
- seam centering;
- sole connection.
A straight-on heel photo is more useful than an angled glamour shot for symmetry.
Labels and Size
Confirm:
- size label;
- model/style code when relevant and readable;
- pair consistency;
- selected size from the order.
Do not infer fit from the printed size alone.
Measurement
A ruler-style QC image is useful when it answers a fit question.
Possible measurements:
- insole heel-to-toe;
- outsole length;
- other seller/warehouse dimensions supplied for the product.
Compare the same measurement with a shoe you already wear.
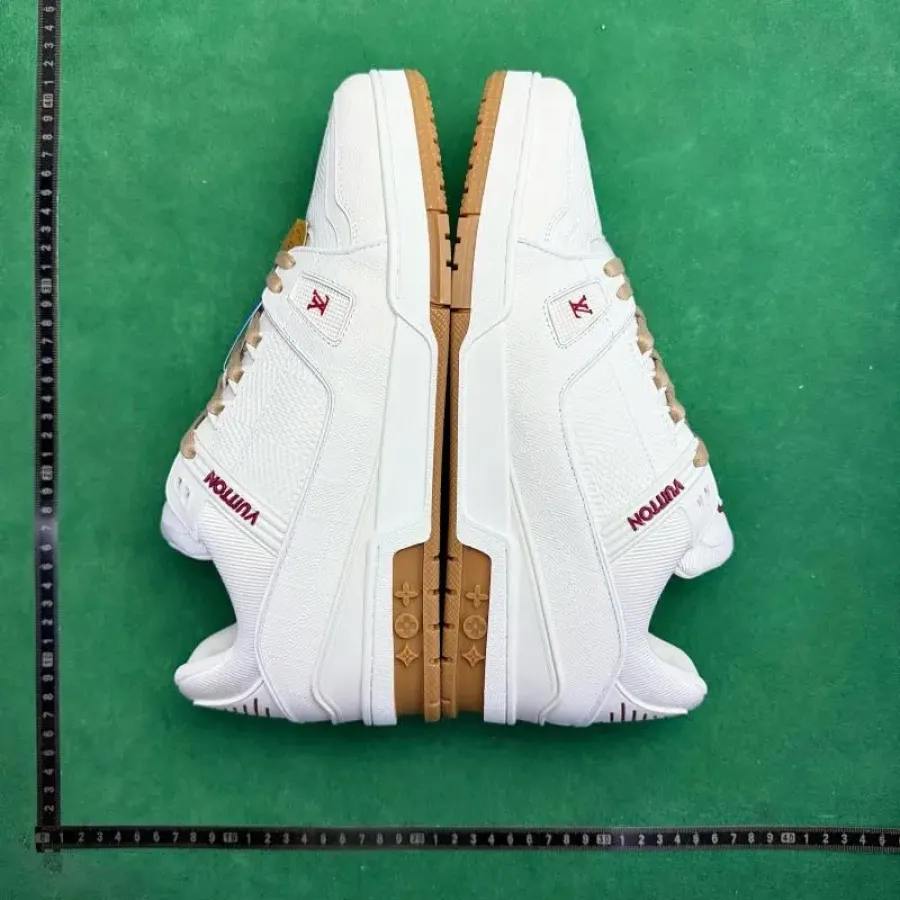
The green-background ruler-style imagery used in the W2C Shoes-QC category is well suited to this purpose because the measurement tool is visually obvious. Use a real image of that type for the Shoes-QC category card on the new site.
Construction Close-Ups
After geometry and size checks, examine:
- stitching consistency;
- panel edges;
- sole attachment;
- visible glue residue;
- printed/embroidered details;
- lace eyelets and hardware;
- surface damage.
Do not over-weight one tiny cosmetic difference if the actual decision is fit or major shape.
Lighting and Color
Warehouse lighting can shift color. Use obvious mismatch as a signal, but avoid declaring a subtle shade wrong from two screens photographed under different conditions.
Box Decision
Shoeboxes can protect footwear and can also add volume.
Keep the box when the packaging matters to you or provides needed structure. Consider removal when the box is disposable and alternative protection is sufficient.
Treat this as a parcel decision, not a QC score.
A Shoes QC Note
Pair identity and size label confirmed. Front/top views show similar toe shape. Heel alignment appears consistent. One side-profile close-up still needed on the right shoe. Insole length requested because fit is the main unresolved question.
That note makes the next action obvious.
Common Shoes-QC Mistakes
Judging only one shoe
Always compare the pair.
Using the size label as the fit check
Use measurements when available.
Comparing different camera angles as if they were identical
Perspective changes proportions.
Zooming into logos before checking shape
Large geometry issues matter first.
Treating reference QC as a guarantee
Your own warehouse item is the item you are deciding on.
When to Request an Extra Shoe Photo
Request one when the current set leaves a specific, decision-changing question unanswered.
Useful requests:
- straight-on heel comparison of both shoes;
- top view of both toe boxes side by side;
- left and right size labels;
- insole heel-to-toe measurement;
- close-up of a visible defect;
- side profile from the same height/angle.
Avoid requesting random additional photos without a target.
Pair Symmetry Is Not Pixel Symmetry
Handmade or mass-produced products can have small variation, and camera position can make one shoe appear larger than the other.
Look for repeated structural differences across multiple views rather than judging a single pixel-level mismatch.
Fit Evidence Hierarchy for Shoes
From weaker to stronger context:
- familiar US/EU/UK size label;
- seller conversion chart;
- stated foot-length recommendation;
- insole/outsole measurement with a clearly defined method;
- comparison against a shoe you already wear in the same measurement method.
None guarantees comfort because width, toe-box shape and internal padding still matter, but the later steps usually provide more context than the label alone.
Why Ruler-Style Warehouse Photos Are Useful
Warehouse photos with a visible ruler or measurement tool can make scale easier to judge. Use them to compare dimensions, pair proportions and the measurements that matter to fit. The background itself is not a quality signal; the useful information is the visible item, measurement reference and camera angle.